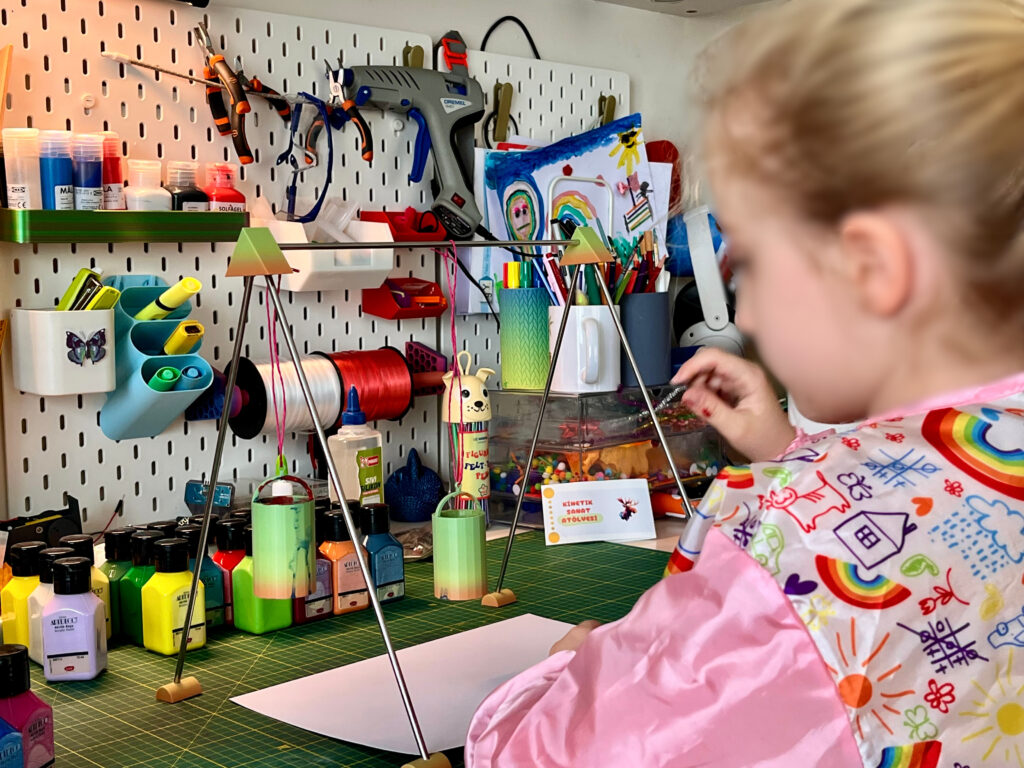
Hello dear parents and educators! In this post, we will discuss an exciting activity known as Pendulum Painting —a project that brilliantly combines both artistic and scientific elements. Pendulum painting allows children of different ages to express their creativity while also learning fundamental physics concepts. Plus, it’s incredibly colorful and fun!
1. What Is Pendulum Painting?
Pendulum painting involves suspending a paint-filled container (or small buckets) from a fixed point and letting it swing back and forth like a pendulum. As the container moves, paint drips onto a paper or canvas below, creating circular, spiral, or wavy patterns. These patterns are influenced by physical forces like gravity, acceleration, and centripetal force.
This activity helps develop motor skills, hand-eye coordination, and artistic creativity, all while providing an experimental setting for children to observe basic physics principles.
2. What Materials Do You Need?

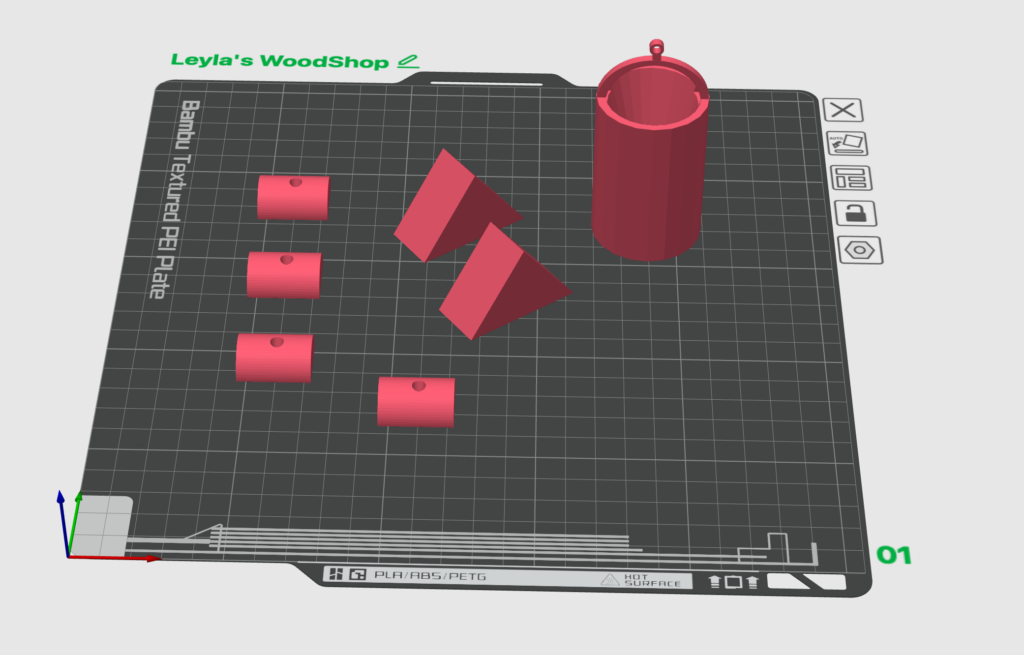
- 3D-Printed Parts: In this project, we used 3D-printed joints, bucket-hanging attachments, and other components. If you have a 3D printer, you can download and print these parts yourself. Otherwise, you can obtain them from us if you prefer.
- Steel Rods: We recommend using hardened steel rods that are 4.5 mm in diameter and 30 cm long. You can find these in hardware stores or from online hobby shops.
- Paint Containers: You can use small plastic or metal cups. Make sure to drill a small hole in the bottom or lid of the container so the paint can drip through. Some people use straws or a simple cap system for better control.
- Paint and Water: Acrylic or finger paints work best. Dilute the paint slightly with water to achieve the right consistency. Avoid making it too thick or too thin; experiment to find the perfect flow.
- Paper or Canvas: Pendulum painting can be done on large sheets of paper, canvas, fabric, or even cardboard.
- Workspace: Paint can splatter, so protect your surfaces with newspaper or a plastic drop cloth. A table or floor space with ample room is ideal.
3. Setup Steps
1. Assemble the Frame
- Use the 3D-printed connectors to join the steel rods.
- Arrange the legs in a triangular or “A-frame” formation, ensuring the top rod is in position to hang the paint cup from.
- Make sure the structure is stable and balanced on the ground or table.
2. Prepare the Pendulum (Cup or Bucket)
- Drill a small hole into the bottom of each container or use a lid with a small opening.
- Hang the containers with string or wire from the top rod (or through the 3D-printed attachments).
- Adjust the height so that it’s not too close or too far from the surface.
3. Mix the Paint
- Combine acrylic or finger paint with water to achieve a consistency that flows smoothly but isn’t overly runny.
- Start with minimal water, then add more as needed.
- You can prepare multiple paint colors separately, allowing you to swap out different colored cups during the process to create multicolored designs.
4. Test and Swing
- Fill the pendulum cup with paint and set it swinging gently.
- Give it a slight push so it moves in a forward-back or circular motion.
- Watch how the paint drips through the hole to create unique shapes on the paper or canvas.
5. Cleanup and Drying
- It’s easiest to clean up while the paint is still wet.
- Let your artwork dry thoroughly. You can use a clear coat or varnish to protect it once it’s fully dry.
4. Benefits of Pendulum Painting
4.1. Artistic and Creative Development
- Color Choices and Combinations: Children learn color theory in an intuitive way by mixing different paints.
- Original Artwork: Each movement and paint consistency produces a unique result, ensuring every creation is one-of-a-kind.
4.2. Motor Skills and Hand-Eye Coordination
- Fine Motor Skills: Filling cups with paint, tying strings, and adjusting holes all refine hand and finger dexterity.
- Hand-Eye Coordination: Observing the pendulum’s movement and predicting where the paint will land enhances visual tracking skills.
4.3. Scientific and Mathematical Exploration
- Physics Concepts: The pendulum’s motion helps kids grasp basic ideas of gravity, momentum, frequency, and centripetal force.
- Experimental Learning: Children can explore questions like “What happens if I start the swing from a higher point?” or “How does thicker paint affect the pattern?”
- Geometry and Patterns: Circular and elliptical lines introduce elementary geometric concepts.
5. Developmental and Scientific Benefits by Age Group
1. Ages 3–6
- Focus on simple hand-eye coordination and color recognition.
- Supervision is essential; adults can guide them in filling cups and gently starting the pendulum.
2. Ages 6–9
- Kids become more deliberate in controlling the pendulum to create specific designs.
- They learn cause-and-effect relationships by adjusting paint consistency and swing angles.
3. Ages 10–12 and Above
- Delve deeper into physics and geometry concepts.
- Incorporate mini-experiments: measure and compare swings, explore the pendulum’s period, and see how different heights affect the outcome.
6. Tips and Precautions
- Supervision: Younger children should always be supervised, especially when handling paint and tools.
- Protect Clothes and Surfaces: Paint can splatter, so consider using aprons and covering floors or tables with drop cloths.
- Paint Choice: Opt for non-toxic, water-based paints.
- Trial and Error: Finding the right paint consistency takes practice. Enjoy the process of experimentation!
7. How to Get These Parts
If you’d like to replicate this setup, you can order the 3D-printed components from us. Alternatively, if you have access to a 3D printer, we can provide the files, and you can print them at home or in your workshop. Feel free to contact us for more details or questions.
8. Share Your Own Project!
Once you’ve created your pendulum painting masterpieces at home or in the classroom, don’t forget to share your experiences and photos in the comments! We’re excited to see how your designs turn out and would love to learn about:
- Which paint brands you used
- The size or style of your containers
- Any innovative modifications you tried
Feel free to tag us on social media or post your work in the comments section so we can all be inspired by your creativity.
Conclusion
Pendulum Painting is a fascinating way to blend science and art, giving children an immersive environment to develop problem-solving skills, creativity, and fine motor abilities. Each child’s creation is unique, making it both an artistic and educational experience that they’ll remember for a long time. Whether at home or school, this activity offers endless opportunities to explore physics, geometry, and color theory in a fun, hands-on manner.
We wish you and your children a wonderful time experimenting with pendulum painting. Enjoy the colorful, swinging adventure!


