The significance of technology in children’s education is continually growing. Tools like 3D printing, robotics, and programming are not just avenues for fun but are instrumental in teaching new skills. This article introduces a project perfect for family bonding at home—a simple, 3D-printed catapult system. It’s an engaging way to explore basic engineering and programming concepts.

Materials List
Here’s what you’ll need for this exciting project:
- 3D Printer: If you don’t have one, you can find services online that print and ship 3D objects.
- PLA Filament: The standard material for 3D printing due to its user-friendly properties.
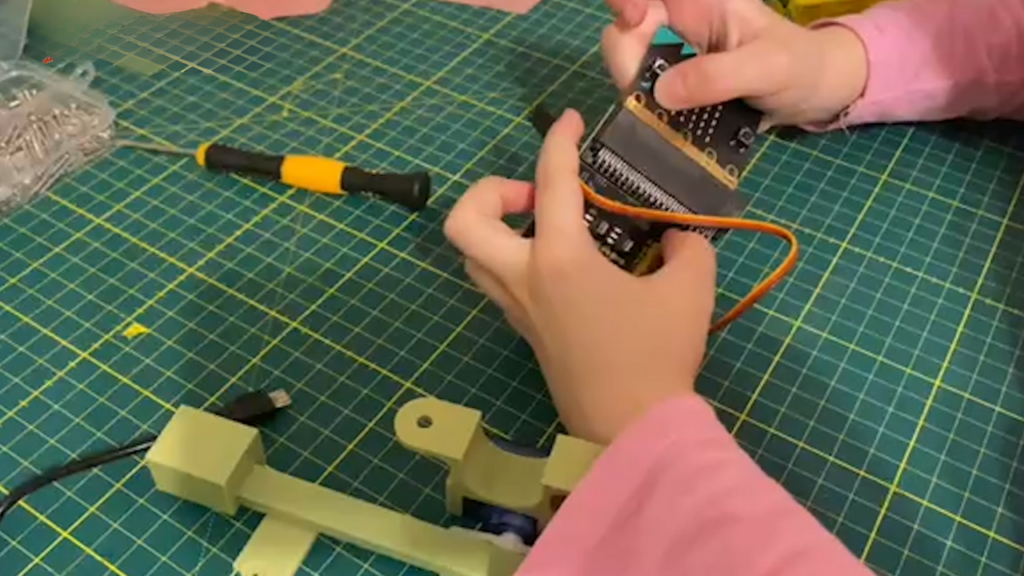
- Microbit V2: A compact, powerful tool for programming and electronics projects.
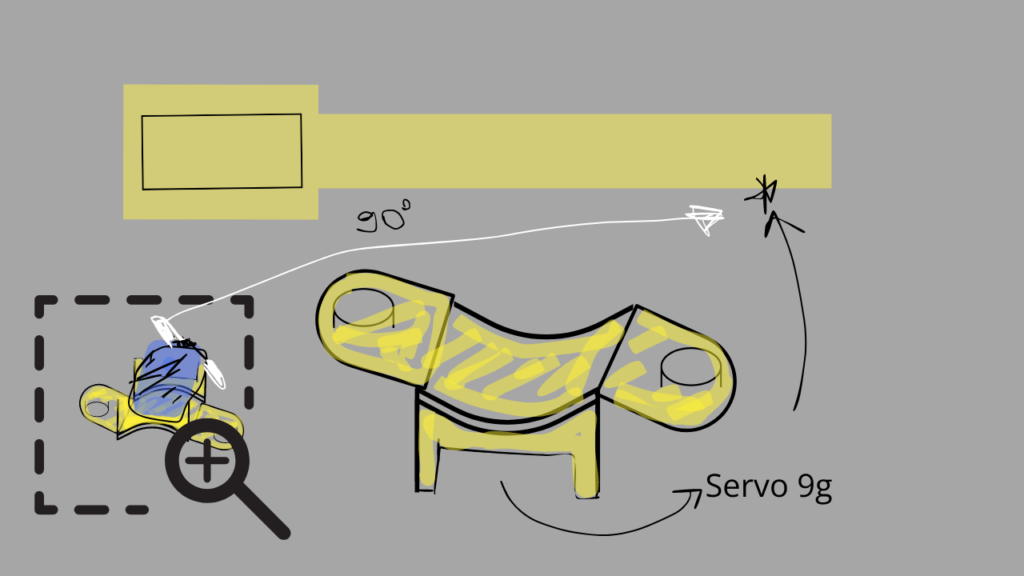
- Servo Motor (Servo 9g model recommended): This will actuate the catapult’s arm.
- Expansion Board: For connecting the servo motor to the Microbit.
- Uhu Superglue: To firmly attach your catapult to its base.
- Mini Objects: These will be launched by the catapult.
- 10×10 cm Base: To stabilize the catapult and prevent tipping during launches.
At the article’s end, you’ll find links for the 3D design files and sources for purchasing the necessary materials.
From 3D Design to Reality: Create Your Own Catapult
The adventure begins with designing your catapult in 3D. This step lays the groundwork for the entire project, letting children unleash their creativity to bring ideas to life. The process of 3D design also introduces them to fundamental engineering concepts and the art of solving problems creatively.
Assembly and Programming
After printing the parts, you’ll assemble the catapult, enhancing kids’ manual dexterity. Programming comes next, using the Microbit and a servo motor to dictate the catapult’s actions. The motor will pivot from 0 to 90 degrees, then back, enabling the catapult to launch objects with a simple code command.
Ensuring Stability
Given the dynamics of launch, the catapult requires a stable base to prevent tipping. A 10×10 cm platform offers the needed stability, ensuring safe and steady operation. Gluing the catapult to this base also adds to the project’s longevity.
Adding a Musical Twist
For an extra layer of fun, introduce a feature where music plays with each launch. This addition not only makes the experience more enjoyable but also deepens children’s programming skills, allowing them to personalize their projects further.
How to Build Your Catapult: A Step-by-Step Guide
- Design in 3D: Start by creating your catapult in a 3D modeling software.
- 3D Printing: Print your design using a 3D printer.
- Assembly: Put together the printed parts to complete your catapult.
- Programming: Employ the Microbit and servo motor to control the catapult’s launch mechanism.
- Prepare the Base: Secure the catapult to its base to ensure stability.
- Incorporate Music: Add programming to play music during the catapult’s operation.
Creating a 3D-printed catapult at home is an enriching way to engage with your children, teaching them valuable skills like design, engineering, programming, and critical thinking. This project is a testament to how technology can turn learning into an exciting, hands-on experience. Now, it’s time to start building your own 3D catapult and explore the realms of creativity and innovation together as a family!

