The role of technology in children’s education is increasingly significant. 3D printing, robotics, and programming offer excellent tools for children to both have fun and learn new skills. This article details a fun and educational project that families can do at home together: building a simple 3D-printed catapult system.
Materials List
The materials required for the project are as follows:
- 3D printer (You can get 3D printed objects on this website)
- PLA filament
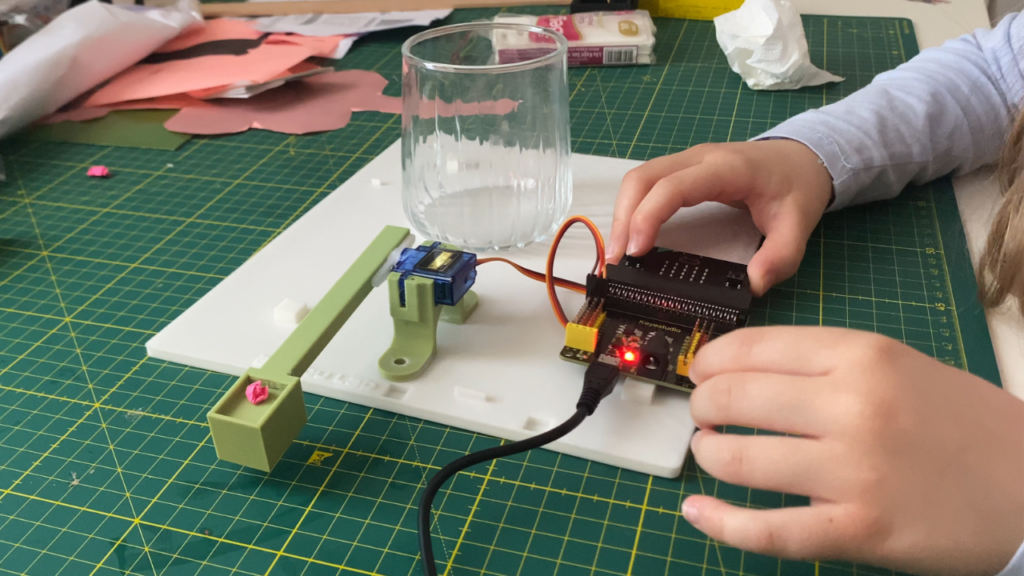
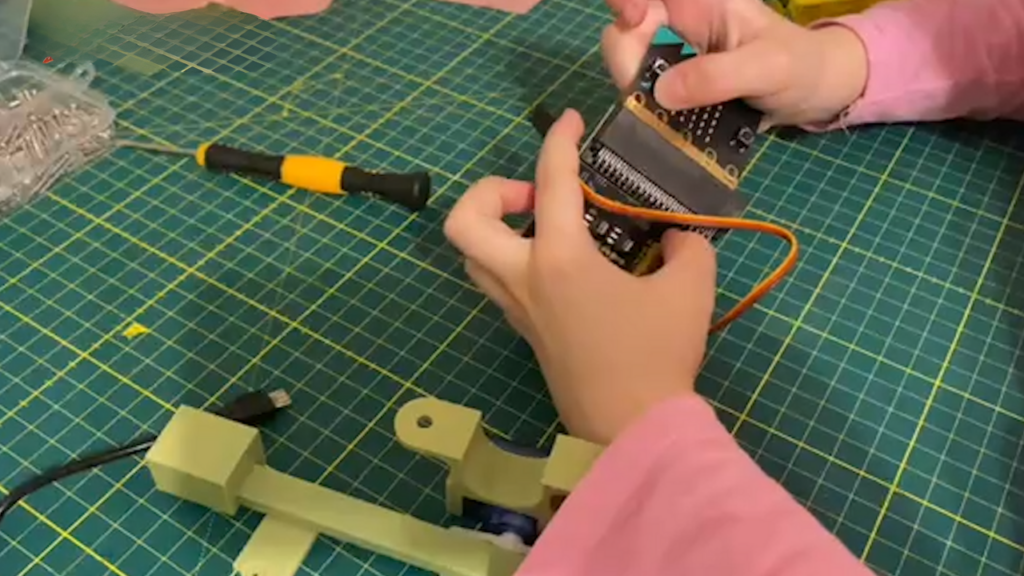
- Microbit V2
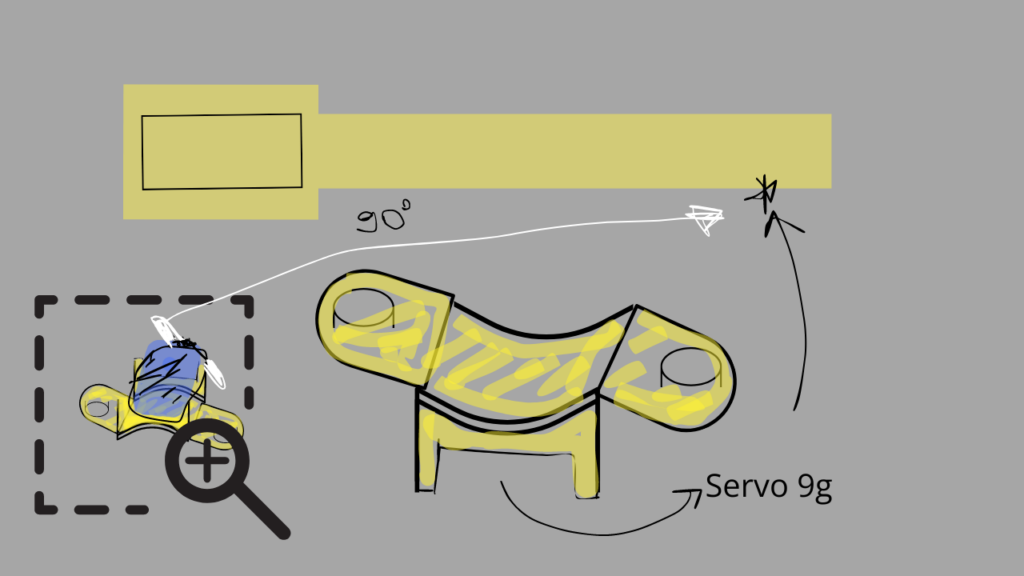
- Servo motor (Servo 9g model recommended)
- Expansion board
- Uhu superglue (adhesive)
- Mini objects (for launching with the catapult)
- 10×10 cm base (for stabilizing the catapult)
Additionally, links to the 3D design files and where to buy the necessary materials can be found at the end of the article.
From 3D Design to Reality: Create Your Own Catapult
The first step in this project is to design the catapult in 3D. 3D design forms the foundation of the project and allows children to use their imagination to turn their ideas into reality. Through the 3D design process, children also develop basic engineering principles and problem-solving skills.
Assembly and Programming of the Catapult
After the design is complete, you can print the catapult parts on a 3D printer and move on to the assembly process. Assembly is a process that improves children’s manual skills. Next, to make the catapult move, you proceed to the programming phase using Microbit and a servo motor. The servo motor rises from 0 degrees to 90 degrees and returns to its original position after 6 seconds. This mechanism allows the catapult to launch objects.
The Importance of a Stable Base
Since the catapult is prone to tipping over with the force of launch, it needs a base, such as a 10×10 cm plate, for stability. This base ensures the safe and stable use of the catapult. Adhering the catapult to the base with glue increases the durability of the project.
Combining Fun with Music
As a fun addition to the project, you can add programming that plays music during the catapult launch. This allows children to further develop their programming skills and add a personal touch to the project.
How Can You Do This Project? Step-by-Step 3D Catapult Setup
- Design in 3D: Create your catapult design using a 3D modeling program.
- Perform 3D Printing: Print the design on a 3D printer.
- Assemble: Assemble the printed parts to build the catapult.
- Program: Use Microbit and a servo motor to program how the catapult will move.
- Prepare the Base: Prepare and glue the base for the stability of the catapult.
- Add Music: Program additional music to play during the launch of the catapult.
Building your own 3D catapult system at home is not only a way to spend quality time with your children but also teaches them valuable skills. Through this project, children can learn about 3D design, engineering, programming, and problem-solving in a fun and engaging way.
This project is an excellent way to learn technology in a fun manner and spend time as a family. Now, start building your own 3D catapult!

